

From your Indystack admin panel, click the DNS option in the main menu.

You will have 2 options: DNS Zones and Connected Domains
DNS Zones
DNS Zones are used when you want to have full control of your domain from your Indystack account.
Please note that changing a domain from a previous DNS provider to Indystack will not duplicate all previous DNS settings. This means you will have to recreate each DNS Zone once migrated. Please ensure you have fully backed up any existing DNS zone settings before proceeding for migrated sites.
When setting DNS Zones option you'll be given the primary DNS settings to change with your registrar. The registrar is where you originally purchased your domain. At this time Indystack does not provide domain registration.
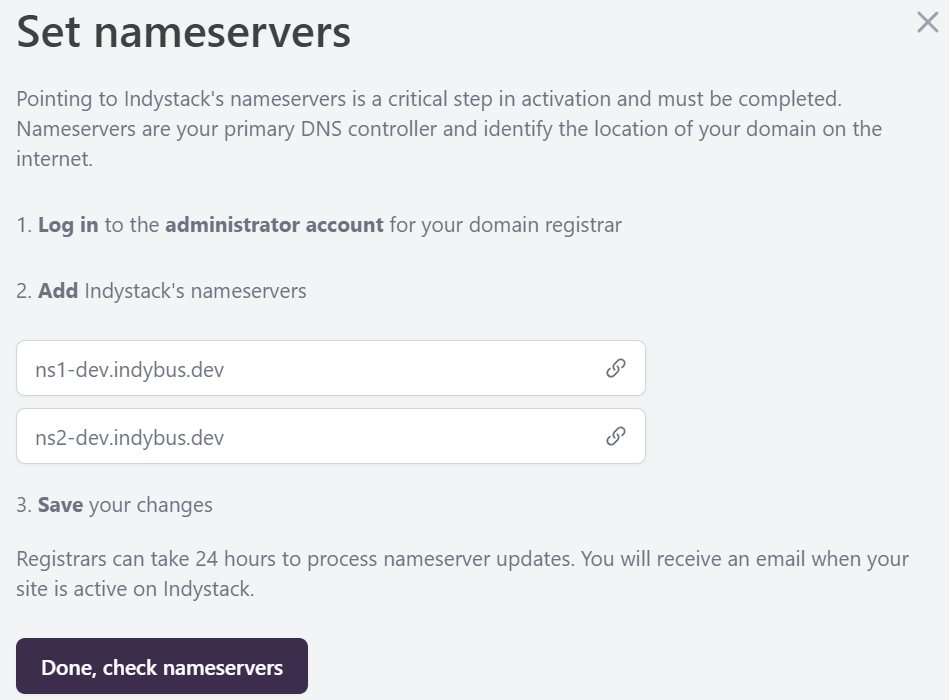
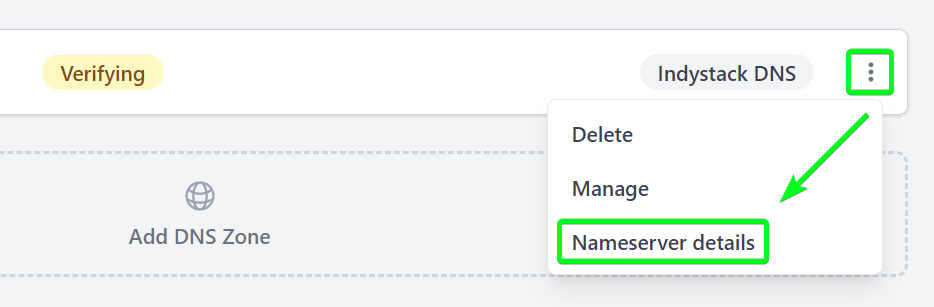
Once you've set the primary nameservers at your registrar click the Done, check nameservers button. If you've logged out and back in you can find this option again by going back to the DNS page, click the 3 dots beside your domain name and select the Nameserver details option.
Connected Domains
Connected Domains is used when you want to keep your primary nameservers with your current registrar. There are many reasons to do this, primarily if you'll be migrating a site and don't want to have to re-create your DNS Zones all over again, you can simply keep the domain where it is, then use the Connected Domains options to obtain the A and TXT records you need to point your domain to your Indystack account.
Click the Connect Domain box to get started. Enter your domain and click the Connect Domain button. You'll be presented with all the settings you need to recreate with your domain registrar.
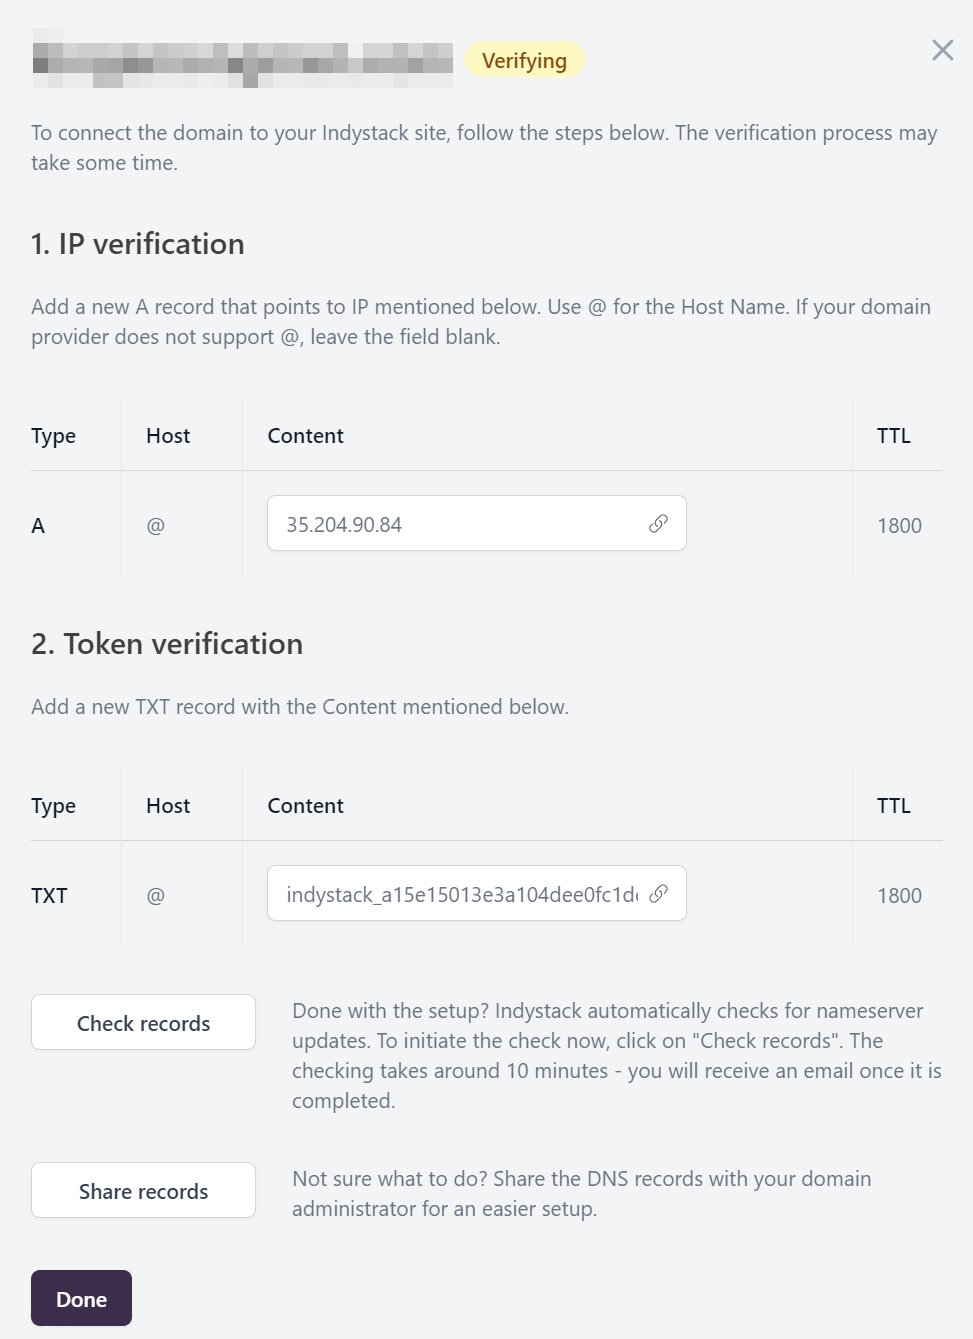
Clicking the link icon (chain) beside any setting will allow you to copy it easily.
After updating your domain with your registrar, simply wait and the domain will auto-verify. A verify notice will be displayed until the domain is updated.

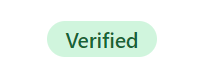
Once your settings are live from your DNS provider, you can use the Check records button to force a check of the domain status. When everything is setup properly you'll see a Verified status.
If your status is not updating, be sure to carefully read the details on the error message and you should be able to resolve the issue. You will see a general status of Verification Failed and further details will be displayed that relate to the issue.

You can also check your domain's live status using a DNS checking tool such as https://www.nslookup.io . If you're not seeing the settings you expect there, you need to contact your DNS provider or domain registrar to confirm the settings for the domain.
If you see the correct settings with a DNS checking tool, but our interface still says you're not using the right settings, then please open a chat support request and we'll investigate the issue from our end.